Weight Shift in the Golf Swing: Pressure, Sequence, and the Fix
Force plates show 'weight shift' is mostly a pressure shift to the lead foot. Here's what good players do, the three faults that wreck it, and how to fix yours.

Quick answer
Weight shift in the golf swing is the transfer of pressure from your trail foot to your lead foot as you swing down. Force plates show the move is mostly a pressure shift, not a big sideways slide: good players load the trail side, drive pressure into the lead foot before the backswing finishes, then post up on a braced lead leg at impact. The three faults that wreck it are the reverse pivot, the sway, and hanging back, and each one moves the bottom of your swing arc.
Weight-shift diagnostic — find your fault, then your fix
| Your fault | What you see on face-on video | The miss it produces | Highest-leverage first fix |
|---|---|---|---|
| Reverse pivot | Upper body tilts toward the target at the top; weight hangs forward going back | Weak slice, thin and topped shots, big distance loss | Load the trail side: feel the lead shoulder turn behind the ball |
| Sway / overslide | Hips slide past the trail foot; pressure rolls to the outside of the trail shoe | Fat and thin in the same bucket; no base to push from | Object outside the trail hip; turn into the inside of the trail heel |
| Hanging back | Head and chest stay behind the ball through impact; weight stuck on the trail foot | Fat, thin, scoopy added loft, flips and pushes | Step-through drill; arrive with clear lead-side pressure |
| Slide without a post | Lower body drives hard but never braces; you stand up out of posture | Inconsistent low point, blocks and snap-hooks | Lead-heel “crush the can,” then post up on a braced lead leg |
Why “weight shift” is really a pressure shift
The term “weight shift” describes a feeling; what actually drives the swing is a pressure shift. Force plates measure pressure, the downward force each foot applies to the ground, rather than the location of your body mass. Swing Catalyst, whose balance plate uses more than 2,000 sensors, makes the point directly: “weight shift refers to the movement of body mass, not the pressure measured by the Swing Catalyst Balance Plate,” and most good players perform a rapid, continuous pressure shift through the downswing.
The distinction is not academic. Keiser University’s College of Golf lays it out cleanly: you can push hard into the ground for a big pressure shift even when your body barely moves sideways. Your center of mass sits roughly below your belly button and travels only a few inches in a good swing. Your center of pressure, the point you are pushing through, can swing from one foot almost entirely to the other.
This is the trap behind most weight-shift advice. Told to “shift your weight,” many amateurs slide their whole body toward the trail foot and then lunge back, which is a sway. The better mental model is to stay reasonably centered over the ball while moving the pressure, loading into the trail heel, then driving it forward into the lead foot.
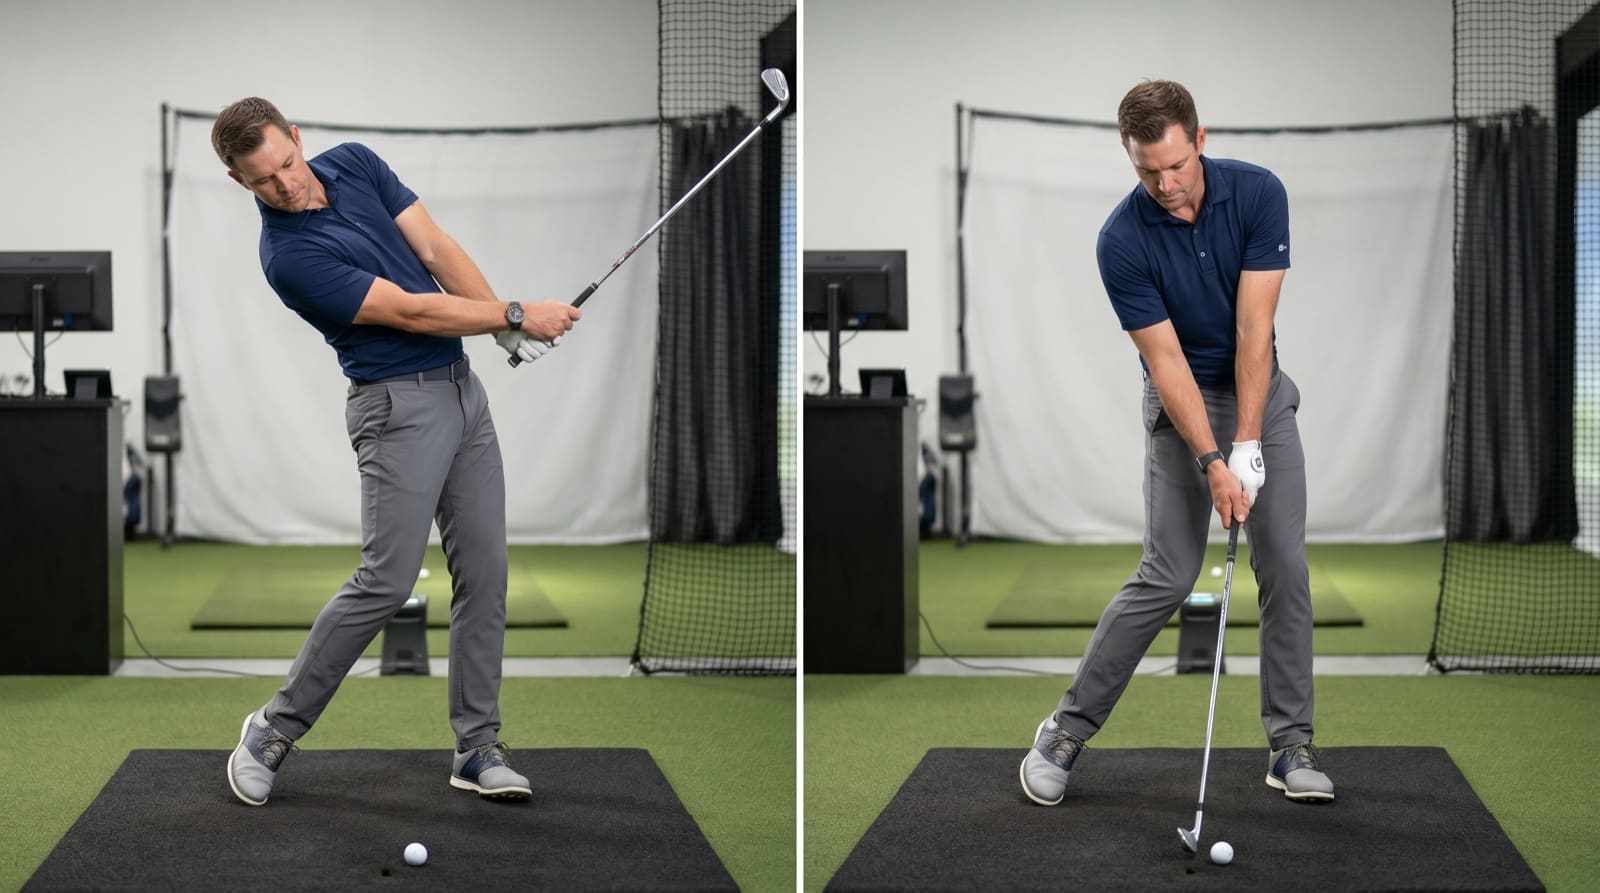
To see your own pattern, film face-on, draw a vertical line on each hip at address, and watch where your hips and pressure travel. No launch monitor required.
What good players actually do with their weight
Good players load the trail side, then shift pressure to the lead foot early and brace it. The sequence is consistent across tour swings: pressure builds into the inside of the trail foot during the backswing, then moves back toward the lead foot in transition, often before the club has finished going back. Keiser’s force-plate summary describes exactly this, the lead shift starting “ideally before the backswing fully completes.”
Pressure through the swing, by checkpoint
| Swing point | Good player | Common amateur fault |
|---|---|---|
| Address | Even to slightly lead-side | 50/50 or already leaning back |
| Top of backswing | Majority loaded into the trail foot, body centered | Reverse pivot (weight forward) or sway (outside trail foot) |
| Transition | Pressure already moving to the lead foot | Still loading, or no shift at all |
| Impact | Clear majority on the lead foot, leg braced | Hanging back on the trail foot |
| Finish | Balanced on the lead side, trail heel up | Falling backward off the shot |
The numbers give you a target. Swing coach Sean Foley, who has coached Tiger Woods and Justin Rose, suggests setting up with about 55% of your weight on the lead foot and arriving near 80% there at impact. Force-plate readings of skilled players often run higher still, into the 85 to 90% range on the lead side at impact. The exact figure shifts with the club, but the direction never does: by impact, the pressure is forward.
What it should not be is a giant lateral slide. The hips can travel a few inches toward the target, but the chest stays poised over the ball while the body rotates. Pressure goes forward; the body mostly turns. That combination is what stabilizes the low point so the club bottoms out in front of the ball, where TrackMan’s attack-angle data shows good iron players still descending into impact.
Ground force is where the distance hides
The lead leg is the speed lever, and it works by pushing against the ground. Once pressure arrives on the lead foot, good players straighten and brace that leg, the “post up” move, which converts a downward push into rotational speed. A peer-reviewed study of 63 highly skilled golfers, all handicap 3 or better, found that the ground-reaction force under the lead foot was the interaction most strongly tied to clubhead speed, peaking near the moment the lead arm reaches parallel in the downswing.
Biomechanist Dr. Sasho MacKenzie, who studies this on force plates at St. Francis Xavier University, found the cleanest single predictor: at the point in the downswing where the shaft is vertical, the vertical force under the lead foot separates fast swingers from slow ones. As MacKenzie puts it, at that instant you want “this vertical ground reaction force to be as high as possible.” This is the mechanism behind the lead-heel “jump” you see from long hitters, the trail heel lifting as the lead leg drives up.
For most amateurs, this is the difference between arm speed and real speed. If your weight is still hanging on the trail foot, the lead leg has nothing to brace against, and the engine never fires. That is why a genuine weight shift shows up on the swing-speed chart and why ground force is a recurring theme in how to add swing speed.
The sequence: lower body leads, then slows down
A good downswing fires from the ground up, and the pressure shift is what triggers it. The efficient order runs pelvis, then torso, then arms, then club, each segment peaking faster and slightly later than the one before. A study comparing PGA tour pros with amateurs found the pros peaked in that pelvis-to-club order, while amateurs often fired the arms before the torso, the classic “from the top” move that leaks speed.
The detail most golfers miss is the deceleration. In that same study, every single pro slowed the pelvis down before impact, and the amateurs did not. The lower body leads, then brakes, and that braking is what hands its energy up the chain to the club, the same whip effect that gives a well-sequenced tempo its free speed.
Pressure shift is the trigger for this sequence, not a separate move to bolt on. When you drive pressure into the lead foot in transition, the lower body has already started leading. Skip the early shift and the arms take over, which is where the next three faults come from.
The three faults that wreck your weight shift
Each of these is a different way the pressure ends up in the wrong place at the wrong time. They share a symptom: the bottom of your swing arc moves, so contact wanders.
The reverse pivot
A reverse pivot moves your weight the wrong way in the backswing: your upper body leans toward the target and pressure hangs on the lead foot at the top, instead of loading into the trail side. From there you have nowhere to go but backward, so weight falls onto the trail foot coming down. Golf Distillery ties this directly to thin contact, because moving weight back ahead of impact drags the bottom of the arc behind the ball, and it commonly produces a weak slice too. The root cause is often limited upper-back rotation rather than effort, so screen your mobility before you drill the move.
The sway
A sway is a lateral slide of the lower body past the trail foot instead of a turn into it. On video, the hips drift outside the trail foot and the pressure rolls to the outside edge of the trail shoe, which removes the stable base you need to push from in transition. Because the body has slid away from the ball, the low point drifts with it, producing fat shots when you stay back and thin shots when you lunge to recover. The fix is to keep turning into the inside of the trail heel, using an object just outside the trail hip as a boundary.
Hanging back
Hanging back is the most common weight-shift fault: the weight never makes it to the lead foot, staying on the trail side through impact. It usually comes from trying to help the ball into the air. The cost is steep, fat and thin shots from a low point behind the ball, plus an early release, or cast, and added loft for scoopy, weak contact. Hanging back travels with early extension and with topped shots, because all three move the arc’s low point. The fix is the step-through drill below: shift in transition and arrive with the clear majority of your pressure on the lead foot.
Drills that build a real pressure shift
The fastest fixes use a constraint that makes the fault impossible, so your body finds the move instead of being told about it. Run them in order, check against video rather than feel, and treat the rep counts as practical targets.
1. The feet-together drill (kills the slide)
Stand with your feet almost touching and make slow half swings with a 7-iron. A narrow base makes a sway or a big lateral slide impossible, so you have to rotate and shift pressure efficiently to keep your balance. Start at 50% effort, focused on brushing the grass and finishing balanced. This is the first drill for anyone whose fault is a sway or overslide.
2. The step-through drill (makes the lower body lead)
Set up with your feet together, then step your lead foot toward the target as you finish your backswing and swing through. The step forces the lower body to initiate the downswing before the upper body has finished going back, which moves pressure onto the lead foot automatically. It is a direct descendant of Gary Player’s walk-through finish and the most reliable cure for hanging back. Do 10 to 15 reps with half swings before adding a ball.
3. The pump drill (sequences the transition)
From the top, “pump” the arms down halfway by shifting pressure to the lead foot and clearing the hips, stop, return to the top, then on the second or third pump swing through. The pump grooves the feel of the lower body leading while the arms wait, so the club lags instead of casting. Keep your chest pointing away from the target during the pump; if your shoulders spin open, you are back to firing from the top.
4. The “crush the can” lead-heel cue (external focus)
Imagine an empty can under your lead heel and crush it flat as your first move down, before the club reaches the top. This single external cue builds the early pressure shift and the lead-leg post at once. The wording matters: motor-learning work by Wulf, Lauterbach and Toole (1999) found that an external focus, on the effect rather than the body part, produced better golf-shot accuracy and retention than an internal cue like “shift your weight.” Put the cue on the ground under your lead heel.
How to measure your weight shift at home
You do not need a force plate to know which way your pressure moves. Two tools cover most of it: a phone and a pair of bathroom scales. The protocol below is the one PracticeCaddie uses to route a golfer to the right fault before prescribing drills.
- Film face-on at 120fps if your phone allows it. Stand the phone 4 to 6 feet away, square to your target line, framing your feet to your head. Draw a vertical line on each hip at address.
- Read the backswing. If the lead hip crosses toward the target or your weight hangs forward, that is a reverse pivot. If the trail hip slides outside your trail foot and the shoe rolls to its outer edge, that is a sway.
- Read impact. If your head and chest are still behind the ball and weight is on the trail foot, you are hanging back.
- Add the two-scale test. Stand with one bathroom scale under each foot, zero them, and make a slow swing while a partner reads the numbers at address and at a held finish. You are checking direction, not lab-grade force: a balanced finish should read clearly lead-side.
The pro tools, Swing Catalyst and BodiTrak, add the timing your scales cannot, when the shift starts and how fast it moves. Save that for a fitting or a lesson; the phone and scales are enough to diagnose your fault and track whether it is changing.
The 4-week protocol that makes it stick
Drills work in week one and quit working by week four if they never meet a real, varied shot. The plan below mirrors the howTo on this page, the same measure-first sequence PracticeCaddie’s AI plans use when a golfer flags fat, thin, or weak-slice misses in onboarding.
- Week 0 — measure your pattern. Film face-on, draw the hip lines, run the two-scale test, and name your fault. Baseline only, no fix.
- Week 1 — build the shift with no ball. Feet-together half swings, then the step-through drill, 30 reps a day. Lower body leads, pressure moves forward.
- Week 2 — add the club and an external cue. Half-swing 7-irons with the “crush the can” lead-heel cue. Goal: 8 of 10 finishing balanced on the lead side, trail heel up. Re-film.
- Week 3 — sequence and randomize. Add the pump drill, then an 18-shot list rotating club and target so no two shots match. This random phase is what transfers the fix; see block vs random practice for why.
- Week 4 — pressure-test and play. Three cold shots to a 30-yard window to end each session. Re-film, play nine holes, and log every fat, thin, or weak-slice miss.
- Maintenance — re-measure every two weeks. The habit returns under pressure, especially with the driver. Two regressed sessions in a row triggers a single feet-together and step-drill reset.
When to stop self-coaching and get on a force plate
Self-coaching handles most weight-shift faults. Two patterns are worth a session with a coach who has a force plate or a pressure mat instead of another month alone.
- A reverse pivot that will not load. If you cannot feel the trail side load no matter the drill, the limit is often upper-back mobility, and a stable, athletic setup plus a movement screen sorts it faster than swing thoughts. A coach can confirm whether the bottleneck is physical.
- A two-way miss that survives the protocol. Fat one swing, weak slice the next, with the fault returning the moment your focus drifts, usually means the weight shift is tangled with a path or release problem that is hard to see from your own phone. A launch-monitor lesson sorts the layers in about an hour.
A single force-plate or launch-monitor lesson typically runs around $75 to $150 depending on the coach and market, worth it when the missing piece is the diagnosis rather than the drill.
Common mistakes
- Sliding the body instead of moving the pressure. “Shift your weight” turns into a lateral slide and a sway. Stay centered and drive the pressure into the lead foot.
- Shifting late. The pressure should move to the lead foot in transition, before the backswing finishes, not after the club is already coming down.
- Internal cues at full speed. “Get to your front foot” falls apart under speed. Switch to an external cue like “crush the can” once the drill has built the feel.
- Skipping the face-on video. A reverse pivot and a sway look similar from behind. Face-on, with hip lines, is the view that tells them apart.
- Block practice for four weeks. Same club, same target, 50 reps. The shift looks fixed on the range and reverts on the first tee. Week 3 must be random, and ball position can hide the problem, so confirm your ball position is neutral first.
Key takeaways
- Weight shift is mostly a pressure shift. Force plates measure the force under your feet, not your body mass; you can shift pressure hard while staying centered.
- By impact, your pressure is forward. Sean Foley’s target of about 55% lead at address and near 80% at impact is a useful checkpoint; finish balanced on the lead side with the trail heel up.
- Ground force under the lead foot drives speed. A study of 63 golfers with a handicap of 3 or better found lead-foot force the interaction most tied to clubhead speed.
- The lower body leads, then brakes. Pros sequence pelvis to club and slow the pelvis before impact; amateurs often fire the arms early.
- Three faults, one symptom. The reverse pivot, the sway, and hanging back all move the bottom of your arc, which is why they cause fat, thin, and weak-slice misses.
- Use an external cue. Wulf et al. (1999) showed an external focus beats an internal one for golf accuracy and retention; “crush the can” beats “shift your weight.”
- Transfer beats reps. Random, mixed-club practice from Week 3 carries the fix to the course; give the protocol three to four weeks before you judge it.
Frequently asked questions
What is weight shift in the golf swing?
Weight shift is the transfer of force from your trail foot to your lead foot through the swing: you load the trail side in the backswing, then move onto the lead foot in the downswing and finish balanced there. Force plates show the move is mostly a pressure shift, the center of pressure sliding across your feet, rather than a big sideways slide of your body. Good players push the pressure toward the lead foot before the backswing even finishes, then brace the lead leg through impact. It is the engine of both solid contact and distance.
What is the difference between weight shift and pressure shift?
Weight shift describes where your body mass goes; pressure shift describes how hard you push into the ground with each foot. Force plates like Swing Catalyst and BodiTrak measure the second one: the center of pressure under your feet, not the location of your center of mass. The distinction matters because you can drive a big pressure shift into the lead foot while your body stays fairly centered, which is exactly what good players do. Amateurs who hear “shift your weight” and slide their whole body sideways usually create a sway instead.
How much weight should be on your front foot at impact?
For most full iron and driver swings, you want the clear majority of your pressure on the lead foot by impact. Swing coach Sean Foley suggests setting up around 55% on the lead foot and arriving near 80% there at impact, and force-plate measurements of good players often read even higher, in the 85 to 90% range. The exact number varies by club and player. The practical checkpoint is simpler: finish balanced on your lead side with the trail heel off the ground, not hanging back on the trail foot.
What is a reverse pivot in golf?
A reverse pivot is a backswing where your weight moves the wrong way: your upper body tilts toward the target and pressure hangs on the lead foot at the top, instead of loading into the trail side. From there you have nowhere to shift, so weight falls back onto the trail foot in the downswing. The result is a weak slice, thin or topped contact, and a large loss of distance, because the bottom of your swing arc moves behind the ball. It is often driven by limited upper-back rotation, so a mobility check comes first.
Why do I hang back and hit fat and thin shots?
Hanging back means your weight stays on the trail foot through impact, usually from trying to help the ball into the air. That moves the low point of your swing behind the ball, so the club either hits the ground first for a fat shot or catches the ball thin on the way up. It also forces an early release, or cast, and adds loft for weak, scoopy contact. The fix is to shift pressure to the lead foot in transition and arrive at impact with a clear majority of your pressure forward.
What is the best drill for weight shift?
The step-through drill is the most reliable, because it makes the correct sequence automatic. Start with your feet together, step your lead foot toward the target as you finish the backswing, then swing through. Stepping forces the lower body to lead and the pressure to move onto the lead foot, so you cannot hang back or sway. Pair it with the feet-together drill, which removes any lateral slide, and cue the move externally as “crush the can” under the lead heel. Train with no ball first, then half swings, then full shots.
Related reading
- Early Extension in Golf: Causes, Drills, and a 4-Week Fix — the posture-loss fault that travels with hanging back; the lead-leg post above is shared between the two protocols.
- How to Grip a Golf Club — the setup cornerstone; a calm grip and square face stop the hand-flip a hanging-back swing uses to save the shot.
- Golf Stance and Posture — the athletic base a real pressure shift pushes from; a stable setup is what stops a sway before it starts.
- How to Fix a Slice in Golf — the weak slice a reverse pivot feeds; run the path fix and the weight-shift fix together.
- How to Stop Topping the Golf Ball — the low-point fault hanging back produces; same root, overlapping fixes.
- Golf Tempo Drills: The 3:1 Ratio — the transition timing that lets the lower body lead and then brake.
- How to Increase Golf Swing Speed — where the lead-leg ground force turns into clubhead speed.
- Block vs Random Practice in Golf — why the Week 3 random phase is what makes the new pressure shift survive on the course.
- Golf practice drills, organized by skill area — the companion drill library, with setup steps and success criteria.
- 30-minute golf practice plan — where the feet-together, step, and pump drills fit into a tight session.
Want a four-week weight-shift plan personalized to your fault, your dominant miss, and your range time? AI plan generation is a Pro feature, and you can try it free for 3 days. PracticeCaddie’s free-forever plan, no credit card, covers the basics, and you can compare what Pro adds any time.
Get your AI-built practice plan in 30 seconds
Free forever plan, no credit card. Pro unlocks unlimited AI-generated plans and 18 expert plans built on the principles in this post.
Start practicing free